Background
One of the more common ways to host a static website for free today is by utilizing Github Pages. A caveat to using it is that you are handed a domain name that might look like example.github.io/some-repo-name. Not exactly the most pretty domain name.
To get around this, consider buying a domain off of GoDaddy, Namecheap, Google Domains, Cloudflare, or another domain registrar.
On your own web servers, you’d normally achieve end to end encryption by setting up virtual hosts on your web server (in this case, github pages) and install an SSL certificate for cloudflare’s domain within github pages, but as Github pages uses an automated system to install SSL certificates for you, there is never a need to manually install SSL certificates. GitHub Pages automatically provides HTTPS for custom domains. Convenient, right?
Two Options to Handle End-to-End Encryption
There are two options to achieve end to end ecryption. The first option is allowing Github pages to establish an HTTPS connection for the whole path. The second option is terminating the SSL connection at cloudflare, then having cloudflare re-establish SSL with github pages.
Allowing Github pages to establish an HTTPS connection for the whole path
This is the simpler option. To achieve this, create a CNAME record pointing to your GitHub Pages URL and make sure to uncheck the ‘proxy’ setting during this setup.
On the github pages side, ensure that Enforce HTTPS is checked.
Terminate the connection at cloudflare, then have cloudflare re-establish with github pages
What’s the difference between the two options?
The main differentiator of the two options is whether you want to rely on the cloudflare CDN (this option) or the fastly CDN (option 1). They’re both very trustworthy and it comes down to personal preference.
UPDATE 6/2024:
According to this post over on the cloudflare community forums, a user says:
Github Pages can’t/won’t generate an SSL certificate while your DNS entries are orange-clouded. You can orange-cloud the DNS entries AFTER the SSL certificate is generated, however, the certificate won’t be able to renew and will expire after 3 months. If you’re using the most secure SSL mode, Full(Strict), traffic will no longer pass when the certificate expires. You can either repeat the process (temporarily grey-cloud) every 3 months, or use the less-secure Full (non-strict) SSL mode which allows Cloudflare to continue trusting the expired certificate (insecure). Or just leave the DNS entries grey-clouded permanently if you don’t actually need Cloudflare proxy features for the site; you’ll still have a CDN since Github Pages uses Fastly.
This suggests to me that using Fastly (not checking the orange cloud) and therefore option 1 is the most hands-off way to achieve end to end encryption. Using the cloudflare CDN requires operating in Full, but NOT Full (strict) mode.
Flexible Encryption (Cloudflare)
By default, the traffic between the client and your domain is usually encrypted, but the traffic between your domain and github pages may actually be sent via HTTP. This can pose as a security risk.
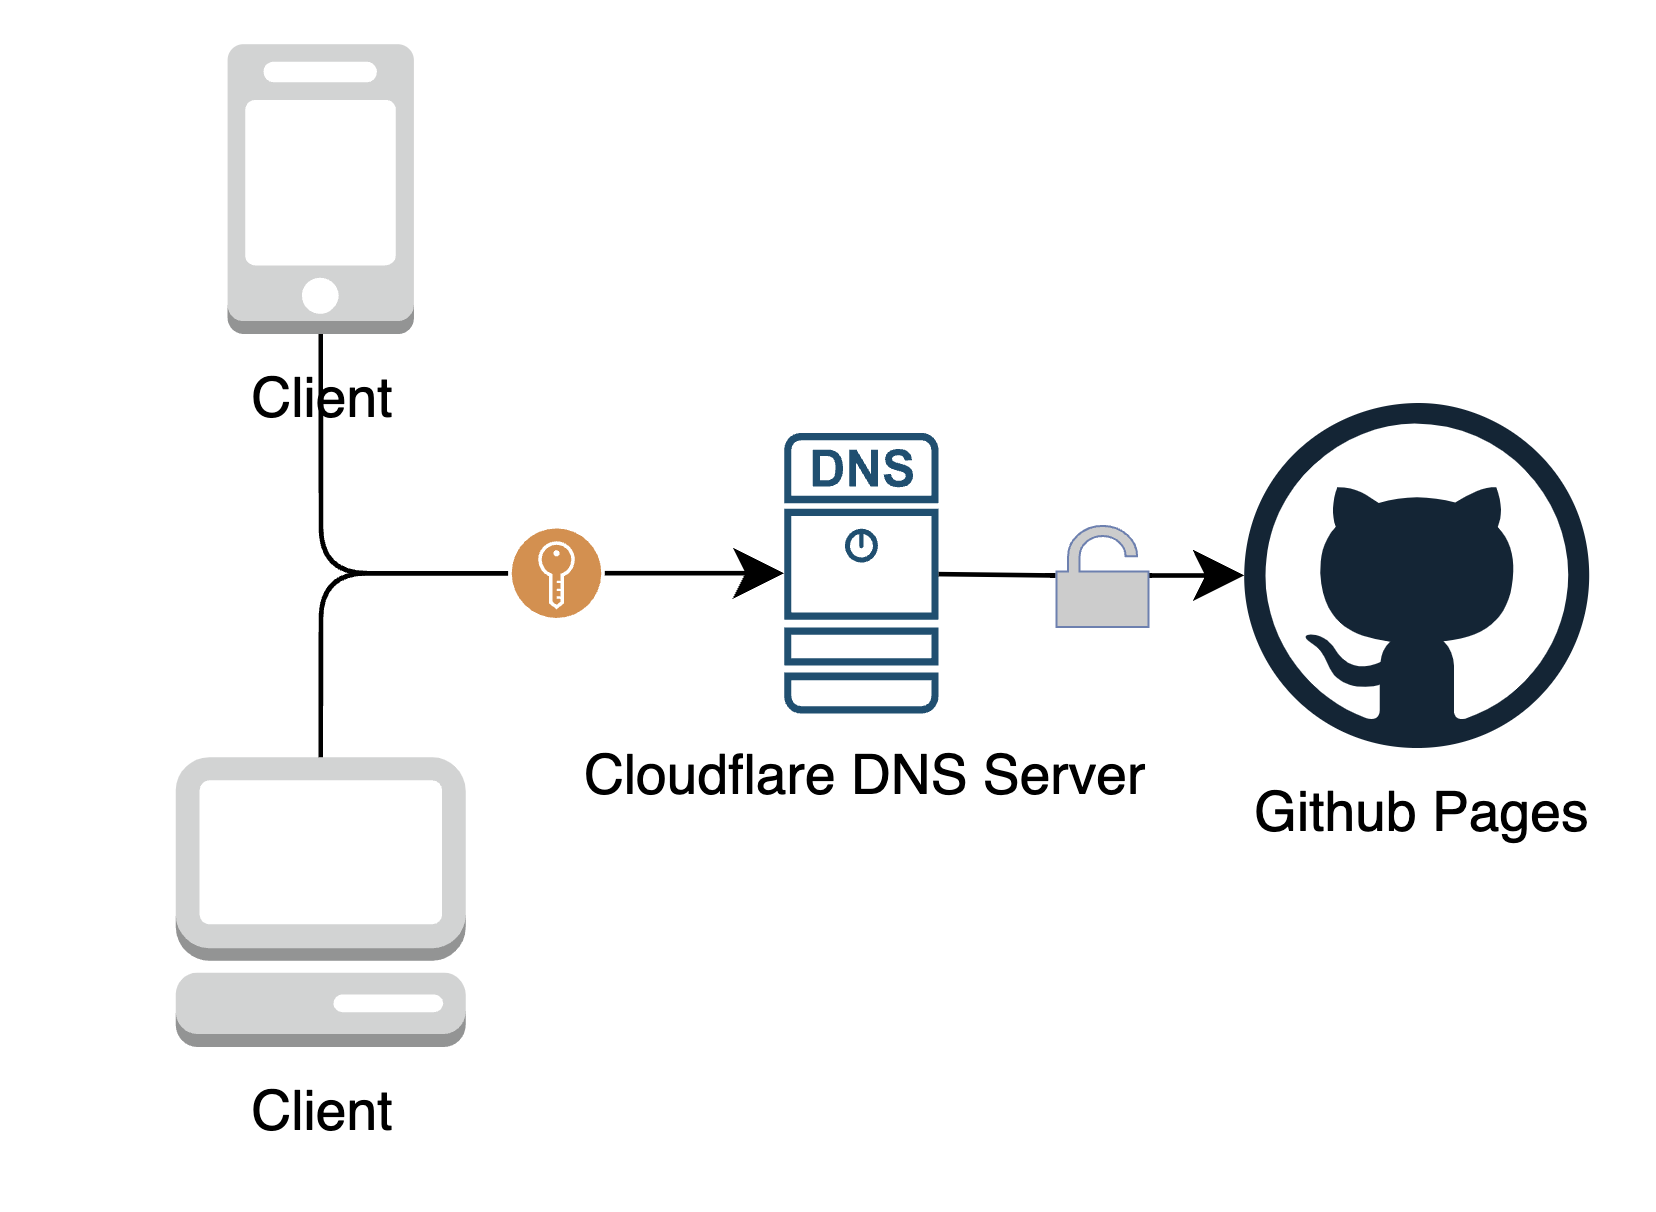
Cloudflare has a mode called flexible encryption enabled by default. We need to change this to enforce end to end encryption.
Going From Flexible to Full (Strict) Encryption
There are 3 steps to active full (strict) encryption:
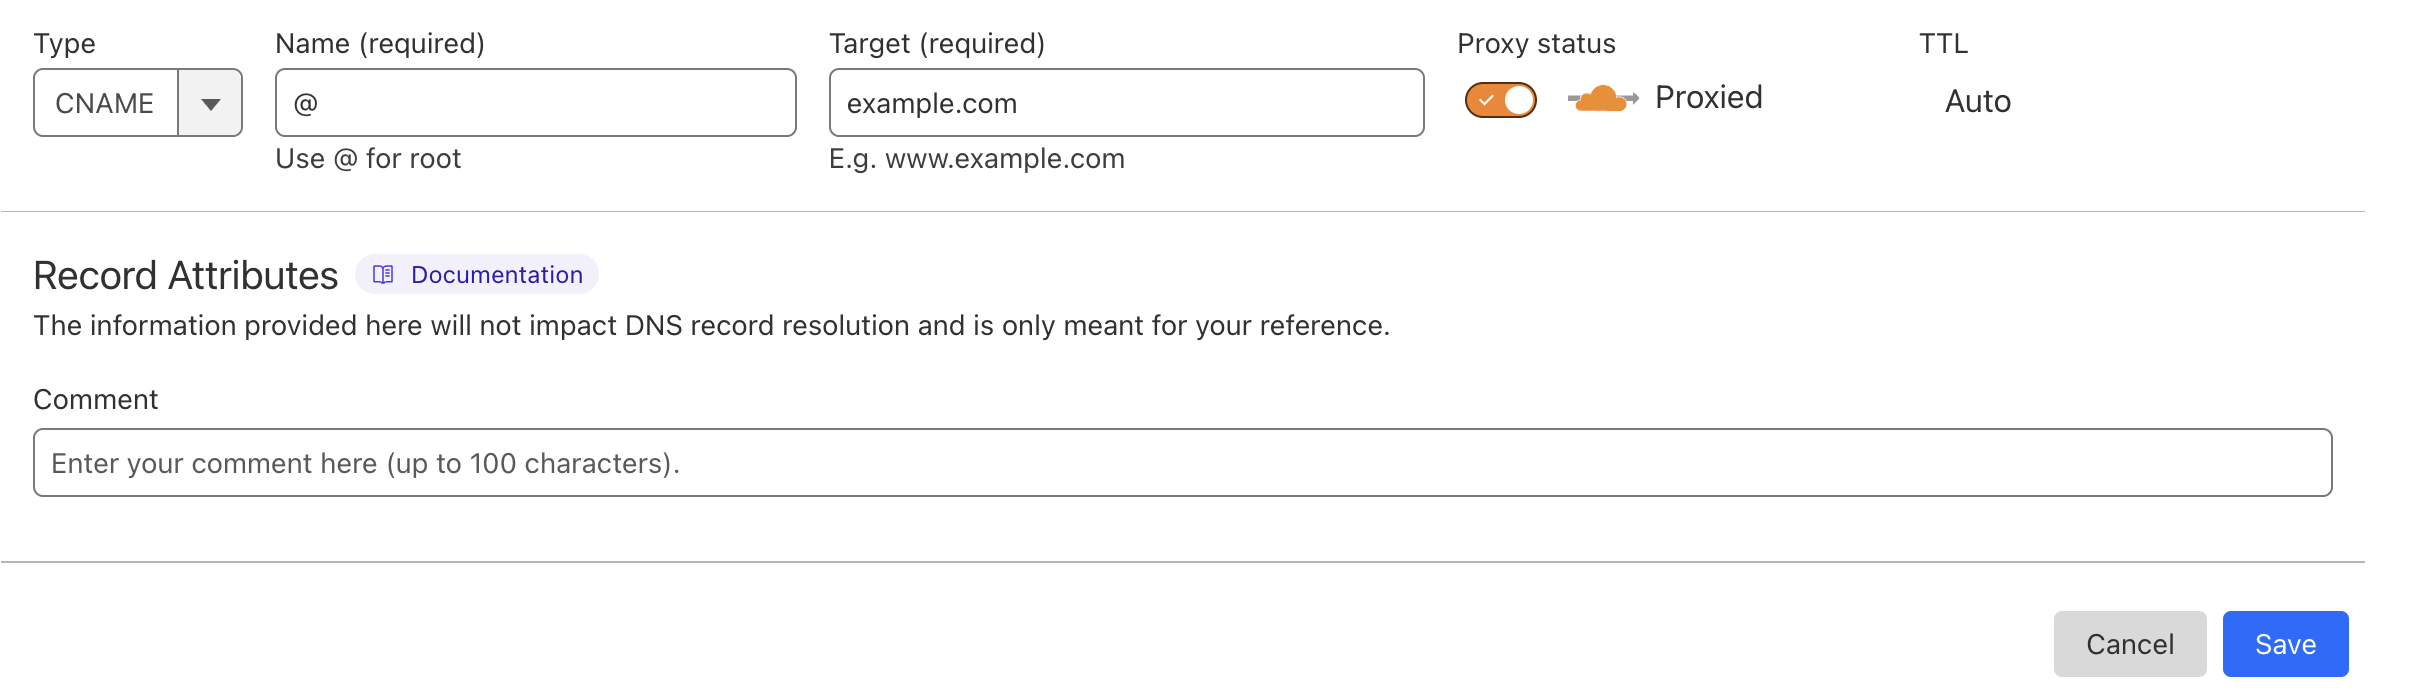
- Create a CNAME record pointing to your GitHub Pages URL (normally looks like
.github.io–there is no need to include the repository name). This can be done by going to the Cloudflare homepage -> login -> click on your purchased domain -> open up the sidebar -> DNS -> records -> add record -> type: CNAME, name: @, target: .github.io
At this stage, ensure that you do NOT check the orange cloud (proxy) switch!
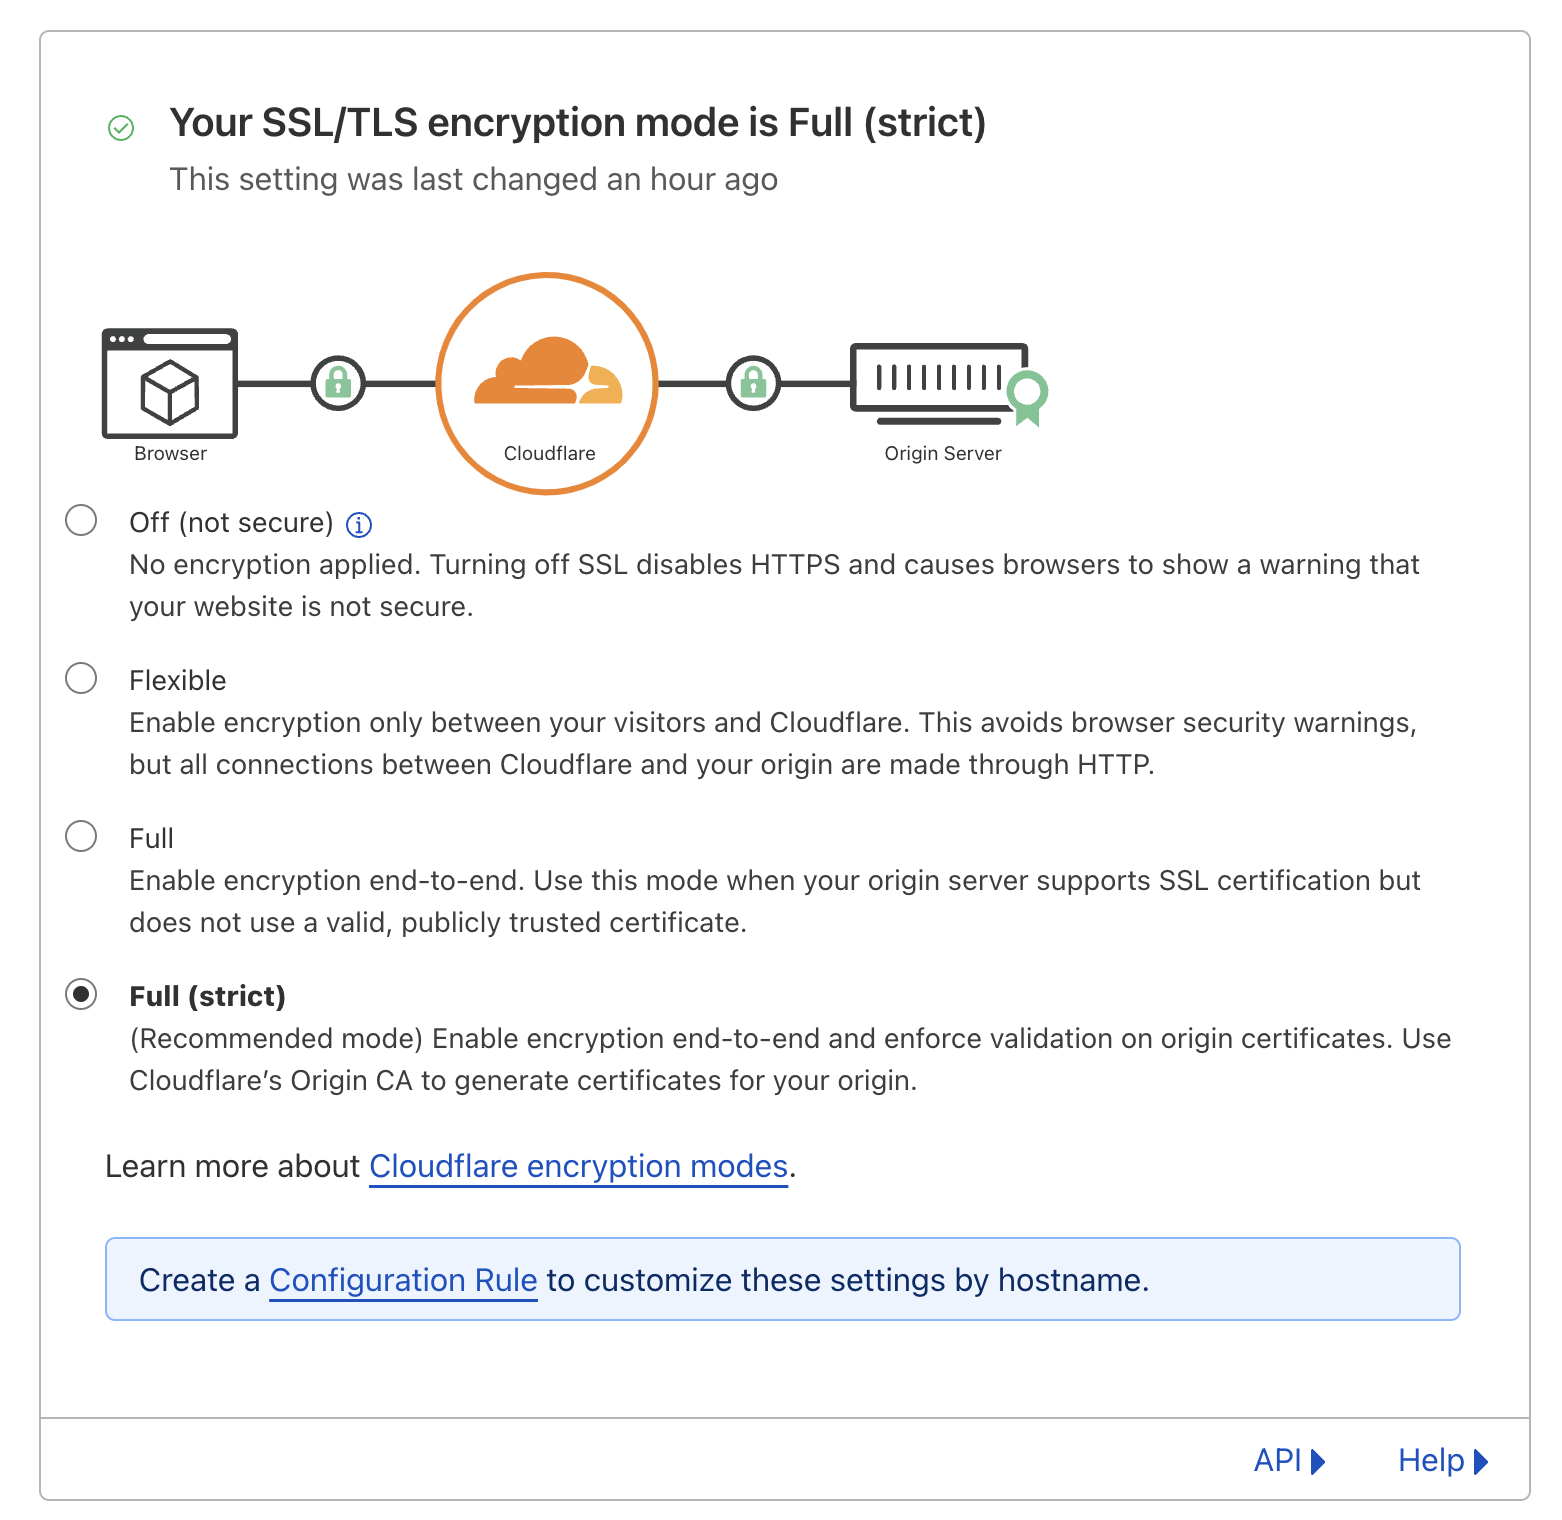
- In Cloudflare, set the SSL/TLS encryption mode to “Full” or “Full (strict)”. This can be done by going to the Cloudflare homepage -> login -> click on your purchased domain -> open up the sidebar -> SSL/TLS -> check the box that says:
1 | Full (strict) |
- Enable HTTPS from the Github pages side
Within your github repo for the pages you are deploying (https://github.com/Enforce HTTPS.
You may notice that there is a message that says
1 | Enforce HTTPS — Unavailable for your site because your domain is not properly configured to support HTTPS (example.com) — Troubleshooting custom domains |
This is usually a sign that DNS propagation has not finished, and you may need to wait for some time before it is possible to enable it. In this state, while traffic from the client to github pages is encrypted, the response might still be visible to cloudflare. It is worth waiting until it is available and enabling HTTPS on the github pages side as well.
Next, depending on if you want to use the cloudflare CDN or fastly CDN, your final step differs.
- if you want to use the cloudflare CDN, go back and check the orange cloud to enable proxying
- if you want to use the fastly CDN, you must wait until DNS propagation is finished. Then check the ‘enforce HTTPS’ option on github pages
Enforce HTTPS only
Go to your cloudflare dashboard > SSL/TLS > Edge Certificates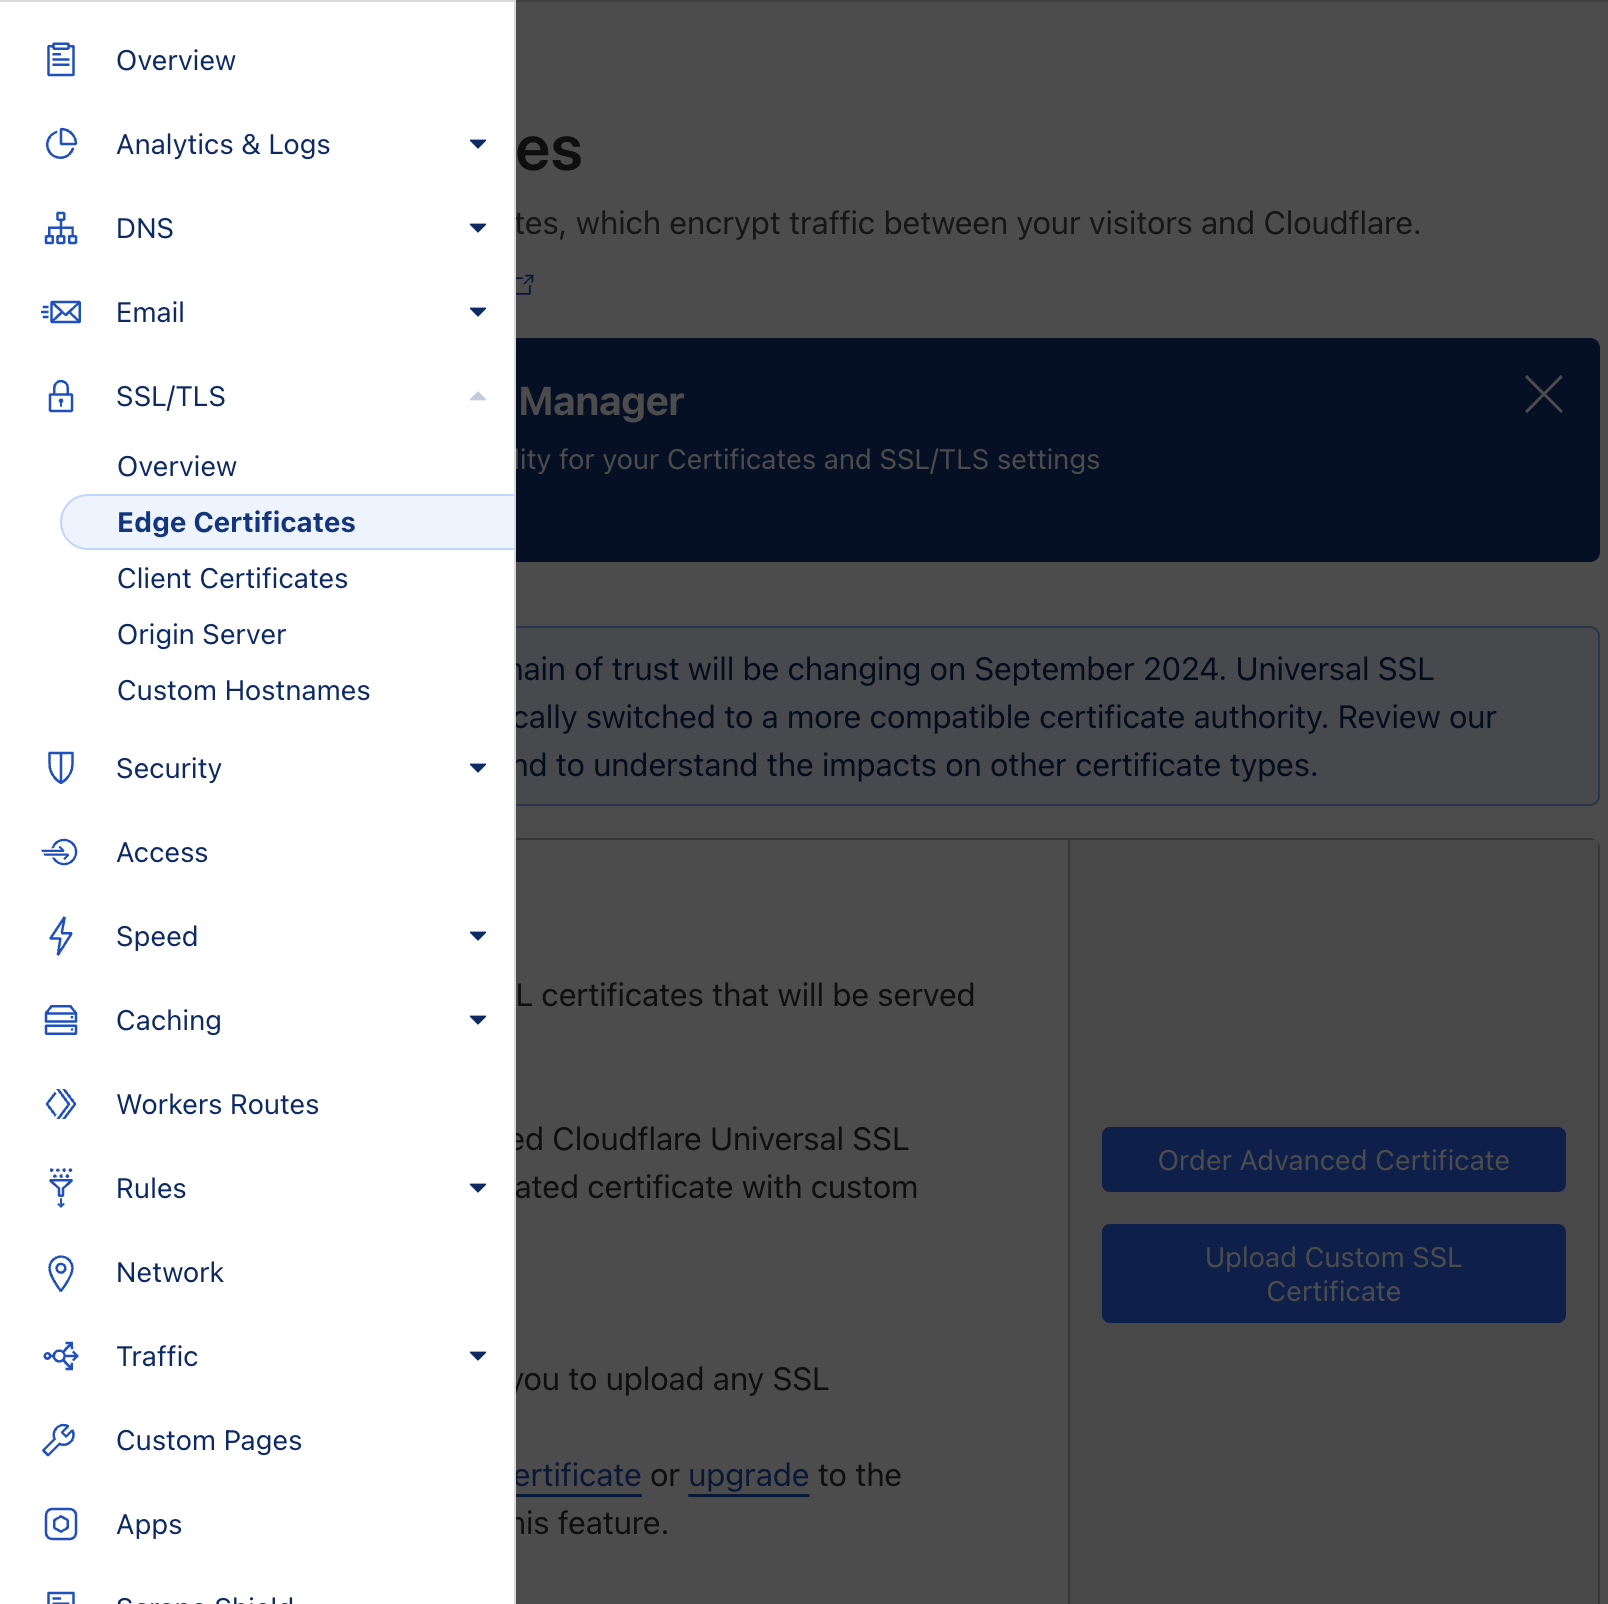
Then enable two options:
Always use HTTPS
Redirect all requests with scheme “http” to “https”. This applies to all http requests to the zone.Automatic HTTPS Rewrites
Automatic HTTPS Rewrites helps fix mixed content by changing “http” to “https” for all resources or links on your web site that can be served with HTTPS.
Congratulations, you now have end to end encryption plus the benefits of using a CDN.